
 by Hurca!








A robust student information system (SIS) should be at the core of any online school management software. The SIS maintains all student records, including contact information, class schedules, grades, attendance, health records, and more. When evaluating SIS features, look for:
Strong student information management will provide the foundation for other critical administrative processes.
Parent and student portals allow families to directly engage with the school. Top portal features include:
Good portals improve school-to-home communication and free up staff resources.
Attendance Tracking
Daily attendance monitoring is essential for student success and government funding. Advanced attendance systems offer:
Robust attendance tools reduce paperwork and give administrators insight into absenteeism patterns.
Simplify curriculum planning and lesson development with built-in instructional tools. Key features include:
Powerful planning and instruction tools help teachers collaborate and deliver impactful learning experiences.
A comprehensive gradebook is the cornerstone of any academic system. Essential components include:
Robust grading platforms provide accuracy, efficiency, and insights for educators.
Complex school scheduling and course registration management require specialized tools. Key attributes include:
Sophisticated scheduling systems help schools maximize resources and student schedules.
Managing student invoices, payments, and accounting is easier with built-in tools. Important financial features include:
Robust financial management improves cash flow and provides stakeholders with transparency.
Data-driven decision-making depends on robust analytics and reporting. Systems should provide:
Powerful analytics give administrators and educators deep insights into operations, learning, and resource allocation.
School management systems shouldn’t operate in a silo. Top solutions offer:
Open architecture allows data sharing across platforms for better insights.
Protecting student data and system access is imperative. Best practices for security include:
Multilayered security safeguards institutions and student data.
Today’s educators and parents are mobile-first. Key mobile features include:
A robust mobile experience keeps the school community connected anywhere.
Even the best software has its challenges. World-class customer support should include:
Support that goes above and beyond will save you headaches down the road.
So, these are the
Selecting the right student management and school administration system is one of the most important decisions school leaders will make.
Investing time upfront to properly evaluate solutions based on features like analytics, portals, and integration will pay dividends for years to come through more effective operations, better decision-making, and higher community engagement.
Leveraging tools designed specifically for educational institutions takes the headache out of manually managing school processes. With smarter school management software in place, leaders can focus on what matters most: driving student achievement.
Student management systems streamline school administration by automating manual processes like attendance, scheduling, grading, and billing. Benefits include improved accuracy, organization, reporting, and communication. These systems save educators time while providing insights to enhance school operations.
Start by outlining your key pain points and areas for improvement. Build a checklist of must-have features based on your needs.
Consider factors like cost, training, and support. Create a shortlist of vendors to request demos from. Ask about integrations, data security, implementation, and ongoing support.
Robust analytics on grades, assessments, and attendance help identify at-risk students early. Parent and student portals increase family engagement.
Custom reporting and standards alignment allow data-driven curriculum improvements. Overall, streamlined processes free up staff resources to support student achievement.
Cloud-based systems are ideal for small schools because they require low upfront investment and IT infrastructure. Look for solutions that offer tailored packages or a la carte pricing. Focus on necessities like attendance, records, gradebook, and leave room to scale up over time. Smaller schools can benefit from more automation and mobile capabilities.
Teachers rely on these tools daily for attendance, lesson planning, grade books, reporting, communication, and more. look for role-based access and training to empower teachers with the features and data most relevant to their responsibilities, like managing their classroom portal or taking attendance on a mobile device. Robust teacher tools make routine tasks effortless.
The post Features To Look For In Student Management And Administration Software appeared first on VVDesigns.]]> by Hurca!Can gravity, pressure, and other elemental forces save us from becoming a battery-powered civilization?
The German word Dunkelflaute means “dark doldrums.” It chills the hearts of renewable-energy engineers, who use it to refer to the lulls when solar panels and wind turbines are thwarted by clouds, night, or still air. On a bright, cloudless day, a solar farm can generate prodigious amounts of electricity; when it’s gusty, wind turbines whoosh neighborhoods to life. But at night solar cells do little, and in calm air turbines sit useless. These renewable energy sources stop renewing until the weather, or the planet, turns.
The dark doldrums make it difficult for an electrical grid to rely totally on renewable energy. Power companies need to plan not just for individual storms or windless nights but for Dunkelflaute that stretch for days or longer. Last year, Europe experienced a weeks-long “wind drought,” and in 2006 Hawaii endured six weeks of consecutive rainy days. On a smaller scale, factories, data centers, and remote communities that want to go all-renewable need to fill the gaps. Germany is decommissioning its nuclear power plants and working hard to embrace renewables, but, because of the problem of “intermittency” in its renewable power supply, it remains dependent on fossil fuels—including imported Russian gas.
The obvious solution is batteries. The most widespread variety is called lithium-ion, or Li-ion, after the chemical process that makes it work. Such batteries power everything from mobile phones to electric vehicles; they are relatively inexpensive to make and getting cheaper. But typical models exhaust their stored energy after only three or four hours of maximum output, and—as every iPhone owner knows—their capacity dwindles, little by little, with each recharge. It is expensive to collect enough batteries to cover longer discharges. And batteries can catch fire—sites in South Korea have ignited dozens of times in the past few years.
Venkat Srinivasan, a scientist who directs the Argonne Collaborative Center for Energy Storage Science (ACCESS), at the Argonne National Laboratory, in Illinois, told me that one of the biggest problems with Li-ion batteries is their supply chain. The batteries depend on lithium and cobalt. In 2020, some seventy per cent of the world’s cobalt came from the Democratic Republic of the Congo. “Unless we have diversity, we’re going to be in trouble,” Srinivasan said. Any disruption to the supply chain can strongly affect prices and availability. Moreover, a lot of water and energy are required for mining the metals, which can cause environmental damage, and some cobalt-mining operations involve child labor. Experts doubt that Li-ion prices will drop more than thirty per cent below their current levels without significant technological advancements—a drop that is still too small, according to the Department of Energy. We need to expand our capacity; by one estimate, we’ll require at least a hundred times more storage by 2040 if we want to shift largely to renewables and avoid climate catastrophe. We may somehow find clean and reliable ways to mine, distribute, and recycle the ingredients for Li-ion batteries. And yet that seems unlikely. Although we usually think about renewable energy in terms of its sources, such as wind turbines and solar panels, that’s only half the picture. Ideally, we’d pair renewable energy with renewable storage.
We already have one kind of renewable energy storage: more than ninety per cent of the world’s energy-storage capacity is in reservoirs, as part of a remarkable but unsung technology called pumped-storage hydropower. Among other things, “pumped hydro” is used to smooth out spikes in electricity demand. Motors pump water uphill from a river or a reservoir to a higher reservoir; when the water is released downhill, it spins a turbine, generating power again. A pumped-hydro installation is like a giant, permanent battery, charged when water is pumped uphill and depleted as it flows down. The facilities can be awe-inspiring: the Bath County Pumped Storage Station, in Virginia, consists of two sprawling lakes, about a quarter of a mile apart in elevation, among tree-covered slopes; at times of high demand, thirteen million gallons of water can flow every minute through the system, which supplies power to hundreds of thousands of homes. Some countries are expanding their use of pumped hydro, but the construction of new facilities in the United States peaked decades ago. The right geography is hard to find, permits are difficult to obtain, and construction is slow and expensive. The hunt is on for new approaches to energy storage.
Quidnet, a Houston-based startup, is one of many companies exploring the possibilities. Last month, I sat in an F-150 King Ranch pickup with Scott Wright, its vice-president of operations, and Jason Craig, its C.O.O., as we drove to one of its test sites, on a farm west of San Antonio. Fields and billboards whizzed by as Craig explained, from the back seat, that Quidnet had patented a new kind of pumped hydro. Instead of pumping water uphill, the company’s system sends it underground through a pipe reaching at least a thousand feet down. Later, the system lets the Earth squeeze the water back up under pressure, using it to drive generators. Wright and Craig are veterans of the oil and gas industry, and Quidnet’s technology is like a green riff on fracking. In that technique, fluid is injected underground, where it builds up pressure that fractures rocks, releasing natural gas. Quidnet uses some of the same equipment and expertise, but with a different goal: the water is meant to be sandwiched between layers of rock, forming underground reservoirs that can be released on demand.
As we drove, I asked about the blackouts Texas experienced in February of 2021, when a winter storm shut down gas plants for several days and left millions without power. More than two hundred people died. The crisis had many causes, including the fact that Texas is the only state whose power grid isn’t connected to grids in other states. “We were pulling buckets of water out of the neighbor’s pool to get toilets to flush,” Wright said. “It definitely screams for some way to store power to lessen the burden on the grid in times like that.”
The artificial underground reservoirs created by companies like Quidnet are known to engineers as “lenses,” because of their shape. (“I say whoopee cushion and people don’t like it,” Craig said.) Initially, Quidnet encountered skepticism about its ability to form lenses of the right size and shape. By the time I visited, however, it had successfully completed multiple pumping cycles in Texas, Ohio, and Alberta. The company has received thirty-eight million dollars in private and government funding, including contributions from Breakthrough Energy Ventures, established by Bill Gates.

Quidnet has benefitted from an energy-storage gold rush. In 2018, the Department of Energy awarded thirty million dollars in funding to ten groups, including Quidnet, through a program called Duration Addition to electricitY Storage, or DAYS. Before leaving office, President Donald Trump signed into law the Energy Act of 2020, which included the bipartisan Better Energy Storage Technology (BEST) Act, authorizing a billion dollars to be spent over five years on the “research, development, and demonstration” of new energy-storage technology. Many states are now setting storage-capacity targets, and in 2018 the Federal Energy Regulatory Commission issued Order 841, which integrates stored energy into the wholesale electricity market. “There’s been a recognition that this is a technology whose time has come,” Jason Burwen, of the American Clean Power Association, told me. But a vast distance separates an engineer’s whiteboard from reality. Many renewable-storage technologies receiving funding will turn out to be too impractical, expensive, or inefficient for widespread adoption.
As we approached the farm, Craig mused on the raw physicality of many companies’ approaches. The basic principles are ones you might recall from high-school physics. If you put effort into lifting an object, it stores potential energy; if you then let that object fall, its potential energy becomes kinetic energy, which is capable of powering a generator and creating electricity. The same holds for many physical actions. In addition to lifting weights, energy-storage companies are compressing air or water, or making objects spin, or heating them up. If you use clean energy to do the initial work and find a green way to store and release it, you’ve created an ecologically responsible battery alternative.
“I’m kind of surprised and encouraged that the solutions to the long-duration-energy-storage problem could be the caveman stuff,” Craig said. Batteries depend on “pretty sophisticated electrochemistry that quickly gets outside of what I understand. And yet the solutions may be picking up heavy stuff with cranes, picking up the earth with a hydraulic jack. I think there’s some fellas in Nevada that are putting rocks in a train and rolling it uphill, then they come back down. Like, Fred Flintstone would be comfortable with most of this stuff. It could be the way.”
We pulled into the farm’s long drive. A kettle of vultures circled overhead.
“You know what that means?” Craig asked.
“The last reporter who came out here?” I said.
They laughed. “That’s right. Too many bad questions.”
I already had one in mind. Was I about to see part of the future of green energy, or a curious and short-lived experiment in rural Texas?
Until recently, we didn’t have to think much about new ways to store our energy. Fossil fuels are a prehistoric energy repository, and we could unlock their energy by burning them and driving generators. There was always more fuel to burn. “Almost all electricity in the world is used as it’s made,” Bill Gross, a longtime investor in solar power and a co-founder of Energy Vault, one of the most highly capitalized new energy-storage companies, told me. Most power that isn’t consumed immediately is lost. The problem is that, with many technologies, “it actually costs more to store electricity than to make it,” he said. In many cases, solar and wind have become less expensive than coal and gas. But add the cost of storage, and renewables can lose to fossil fuels.
Energy is stored all around us, in all sorts of ways. A bottle of fizzy water in your fridge holds energy under pressure; a tower of books contains energy, which is released when it falls. On a larger scale, volcanic eruptions and avalanches release stored energy. But energy storage is most useful when it is predictable, convenient, and dense, packing lots of power into a small space. Climate change notwithstanding, fossil fuels meet all these requirements: by burning just a gallon of easily transported gasoline, you can release enough energy to move thousands of gallons of water from the bottom of a pumped-hydro station to the top.
The post The Renewable-Energy Revolution Will Need Renewable Storage appeared first on VVDesigns.]]>
There is a whole new generation of personal finance experts tapping into specific modern needs.
Unvarnished in style, these new challengers are gaining an audience among those who find established gurus like Dave Ramsey or Suze Orman a bit, well, staid.
They offer advice with attitude: telling their followers to get financially “naked,” warning about reptile-like salesman or yelling that we should save until it hurts.
And people are listening. These new voices have email lists and social-media followings in the hundreds of thousands and are increasingly adding that more traditional marker of influence — a best-selling book.
They’re breaking through at a time when people are searching for help with their planning in the form of an easy read. Annual U.S. personal-finance book sales are up 50% from five years ago [this article was written in October 2020], data from NPD BookScan shows. The Covid-19 pandemic has supercharged this trend, pushing sales of the genre up 28% year-on-year in July 2020.
We asked some of the most influential of the new breed for their thoughts on the personal-finance lessons of the Covid age, as well as what people are asking them.
Erin Lowry
Better known as: Broke Millennial
 Based: New York
Key message: Get financially naked
Best for: Those who are anxious even thinking about money
Break out moment: The 2017 publication of her first book, “Broke Millennial: Stop Scraping By and Get Your Financial Life Together,” was well received by mainstream reviewers and fellow bloggers.
Lowry is that rarest of things: a debt-free millennial. That’s the result of good fortune — having family who could contribute — as well as choices. She turned down her dream college for one that offered a scholarship. Her first job was as a page on David Letterman’s Late Show, and instead of hitting the bars during those years, she babysat to earn extra cash.
Her message is simple: Get your head out of the sand, face up to what you owe and make a plan. Central to her approach is facing up to potentially awkward conversations about money, whether that’s restaurant bills with friends or getting “financially naked” with your partner about earnings and debts. The first step is addressing psychological blocks inhibiting you talking about money — especially those inherited from your parents.
Aimed squarely at the Instagram generation, her commonsense advice focuses on how to deal with FOMO (fear of missing out), why you shouldn’t base your plans on some future hoped-for salary and how to invest while also paying off debt.
How has the pandemic changed what people should be doing with their money?
Technically, I’d changed my recommendation on minimum emergency savings prior to Covid, but I doubled down. The rule of thumb to have a $1,000 emergency savings fund if you were paying off debt is now outdated. The bare minimum needs to be one month’s worth of living expenses if you’re in debt-repayment mode.
I’ve personally become more conservative for my own emergency fund. The standard three to six months used to sound more than sufficient for my household, especially because my husband and I both work, but now I’m aiming for a year’s worth of emergency savings. I know that can sound overwhelming, so six months is still a reasonable suggestion.
What are people worried about during the pandemic?
The questions have quickly pivoted to handling the financial fallout of a job loss or furlough. In many ways, these are unprecedented times because you didn’t have the option to go pick up a side hustle or cobble together an income working some part-time jobs — especially if you were in a higher-risk health category. There was no quick advice to be offered, and instead I worked on curating resources to share, including affordable mental-health services, and tried to offer an empathetic ear.
One of the big things I did push was recommending people create their “bare-essential budget” and know exactly the minimum they needed in a month to financially survive, which is generally money for housing, food, utilities, transportation (especially for essential workers), childcare (in non-quarantine times), and health care. That’s the number on which I advise people to base their emergency funds. It also helps provide clarity on how to cut costs if you lose income.
Monika Halan
Based: New Delhi

Key message: Avoid the sharks
Best for: Emerging market readers who want relevant advice
Break out moment: The 2018 publication of her book “Let’s Talk Money” translated her decades of experience into an easily-digestible tome for the mass market.
For India’s burgeoning urban middle classes, Halan is the go-to voice of financial sense. A government adviser, academic and journalist, she’s on a mission to educate and protect the newly affluent retail consumer from a market which — by western standards — is still very loosely regulated.
A campaigner for better consumer protections, she rails against complex products, commission-based salesmen and warns readers they should treat interactions with the insurance industry “like walking through reptile-infested waters.”
Her books are peppered with broad guidelines rather than prescriptive rules. And offering reassurance is key: Readers are told they are “doing okay” if they’re spending less than 50% of their take-home pay on living costs, for example.
With so many must-read personal finance books targeted at a Western market, Halan’s drawn a legion of fans for her relatable focus on what it takes to live the specifically Indian urban mass affluence lifestyle.
What impact will Covid have on our personal finances?
We are not going to go back to the caves and carts. In fact, the use of technology will take us to a new level of productivity and growth. Use this downtime to upgrade your skills and mindset if you want to stay relevant in the job market. Plan to keep earning for well beyond 60 years old, for we will live longer — no matter that the short-term fear of death makes us feel vulnerable. It is a good idea to have a side hustle that you slowly build up over time. Remember that 60 is the new 40, and you will need to keep yourself busy and earning well into your 70s.
What are people asking you these days?
Should I get out of the market? My answer remains the same: Unless you are a professional money manager, please do not try and time markets and enter or exit on the basis of events outside of your life. If the market crash in March made you feel insecure enough to redeem your entire stock portfolio, clearly your risk profiling was wrong and you are extremely risk averse.
Safety can be built by having a large enough emergency fund rather than putting long-term portfolios at risk. My key personal finance lesson is that asset allocation is the most important part of getting your financial planning right. If you have a good enough safe asset base — high credit quality debt funds, fixed income products — then you can ride out the volatility.
Sam Dogen
Better known as: Financial Samurai
Based: San Francisco

Sam Dogen and his son.
Source: Sam Dogen
Key message: If it’s not hurting, you aren’t saving enough
Best for: High-income earners looking for an escape route
Break out moment: When a 2017 post on how a couple on $500,000 a year could just be “scraping by” went viral.
Dogen is a former investment banker whose advice is all about getting rich — or at least feeling rich. He’s one of the flagbearers of the movement known as FIRE, which stands for Financial Independence Retire Early, and he focuses on generating enough investment income to cover your lifestyle. Traditionally, adherents say you should have enough saved so that you can withdraw and live off of 4% of your portfolio per year.
Rather than tips on living frugally, he offers ideas for making more money, whether that’s investing in real estate, stocks or peer-to-peer lending. That’s coupled with guides on how to avoid others knowing how wealthy you are, with advice on how to negotiate a bumper severance package.
The starting point, though, is extreme saving while you are earning a salary. During his peak employment years on Wall Street at the likes of Goldman Sachs, Dogen says he put at least 50% of his salary each year into building his investment portfolio. Now, he says he and his wife have a passive income of $260,000 — still less than his $300,000 per household benchmark for a middle-class family living in a big city.
What sets him apart from other FIRE advocates has been his decision to stay in high-priced San Francisco. (Most other devotees of the movement relocate to dramatically cheaper areas of the country.) That might change though: He’s considering moving to Hawaii (where they have family) after rising costs and lower interest rates reduced his returns.
How has the pandemic changed what people should be doing with their money?
Covid-19 has seriously changed the way we should all go about retirement planning.
Interest rates have plummeted, as central banks and federal governments pump an enormous amount of liquidity into the system. As a result, it takes a much larger amount of capital to generate the same amount of income. Therefore, we all need to be saving more for retirement, withdrawing less in retirement, or plan to make supplemental retirement income.
The “4% rule” from the 1990s is outdated. It was created when the 10-year bond yield averaged over 5%. Only a minority of people have pensions now. Social Security is underfunded. And we could experience another lost decade in stocks. Instead, people should consider a new withdrawal rule: 0.5%.
What is the most common question you’ve gotten during the pandemic?
Whether to buy property or not. A lot of people remember the housing crisis that began in 2008 and don’t want to repeat it. At the same time, everybody is spending more time at home, so the intrinsic value of a home is going up. With mortgage rates at or close to record lows, housing is also becoming more affordable.
I’m bullish on housing due to positive demographic trends. The millennial generation is in its prime home-buying years. Further, I believe there is a growing desire to own real assets versus paper assets like stocks, especially after the volatility experienced in March 2020.
Scott Pape
Better known as: The Barefoot Investor
Based: Rural Australia

Key message: Stop with the excuses
Best for: Those who just want a plan to follow
Break out moment: His 2016 book, “The Only Money Guide You’ll Ever Need,” sold more than 1.5 million copies.
Pape is a man who can move billions. When he recommended a low-cost pension fund, about A$2.5 billion ($1.8 billion) of new money moved into it. ING Bank saw the number of its fee-free current accounts soar after he suggested them.
His message is all about actions. Nine of them to be precise. You won’t find general tips in his books, but rather a step-by-step plan to sorting out your finances that should be followed in order. Pape has a plan, and often a suggested script, to use when calling a company to negotiate a better mortgage rate, for example.
Pape grew up in the country and lives on the rural farm he rebuilt after it burned down in the horrific 2014 Victoria bushfires. Folksy in tone, he rails against buy-now-pay-later services and the involvement of banks in financial education in schools.
What is the most common question you’ve gotten during the pandemic?
“How do I buy shares? I’ve never done it before.” Seriously, that’s my #1 question. I have over 400,000 people on my email list, and I get thousands of questions every month. Jobkeeper and Jobseeker (the Australian government’s wage subsidy and unemployment benefit programs) have kept most people cocooned from reality, for now.
What’s keeping you busy?
Last year I made the move to become a volunteer not-for-profit financial counselor. We provide free, independent financial help for some of the most vulnerable people in the community and help them get back on their financial feet. I have a feeling that we’re going to be very busy over the next few years.
The post The Modern Experts Are Throwing Out the Old Rules for Managing Money appeared first on VVDesigns.]]>
Meanwhile, there are still a large number of excellent search engines in the world that specialize in books, science, and other smart information.
Here a list of sites you’ve might never heard of.
www.refseek.com is a search engine for academic resources. More than a billion sources
www.worldcat.org – search the content of 20,000 global libraries.
https://link.springer.com – access to more than 10 million scientific documents: books, articles,
www.bioline.org.br is a library of published bioscientific journals
http://repec.org – Volunteers from 102 countries collected nearly 4 million publications
www.science.gov is a U.S. government search engine for more than 2200 scientific sites.
www.pdfdrive.com is the largest website for free download of PDF books. Claim more than 225 million titles.
www.base-search.net is one of the most powerful search engines for academic research texts. More than 100 million scientific articles, 70% of which are free
The post #Google is so powerful that it hides other search engines from us. We simply do not know about the existence of most of them. appeared first on VVDesigns.]]>This guide examines the elements of a professional report and reviews the structuring, styling, and finalizing of your document in Microsoft Word.
If Microsoft Office had been a country, it would have been the third most populous country in the world. 1.2 billion people using a single suite of apps is mind-boggling. And, they “speak” 107 languages!
But right now, you and I are speaking in English and we are going to talk about the most popular tool in the Microsoft Office arsenal — Microsoft Word 2016.
This document editor is used for writing a variety of documents. From a simple application to the necessary resume. From a plain bucket list to an office memo. We think we can work with Word. But it is when we sit down to write a serious professional report, we discover an important fact.
Professional report writing needs a different set of skills.
So, ask yourself this — can you make the leap from a single document to a lengthy report? Do you know all the Microsoft Word features that will help manage this large scale document project? Can you collaborate on the work with other team members?
You may be a student, a small business owner, or an office worker…you will need to create a report or a professionally formatted document of some kind. This MakeUseOf guide will help you update your techniques and sharpen your design approach.
Report writing involves research and then publishing the outcome of that analysis. In the professional world, the “look” or appearance of what you publish is paramount. The eye-pleasing final result could burnish your reputation and enhance your personal brand.
The steps below will handhold you through the expert features in Microsoft Word 2016. Spend a lot of time on a plan. Start with these guidelines…
Before you begin the report, you must first know why you are writing it in the first place. Reports are of many kinds but they are either meant to inform or persuade. It can be meant for describing a technical process, sharing background information, or demonstrate progress on a project.
Ask yourself – What and Why. This will help you distill the purpose to the one main point and stick to it instead of rambling on with unnecessary details.
The second important consideration is to evaluate your audience. Will they be able to understand what you are talking about? Are there different levels of readers who will read the report? The reader’s knowledge of the subject will greatly influence the information that you need to include.
Decide on the primary audience and then script the report at the adequate technical level. The secondary audience can be supported with supplemental information at the end of the report.
You must know what you are talking about. So, research the topic, and include all the relevant information to prove your point. Make sure that you come to a conclusion based on facts and not personal opinion. The information must be correct, current, and well-referenced.
Also use a variety of resources such as journals, newspaper articles, books, websites, brochures, raw data, annual reports, and speeches to help support your point. Just don’t stick to Wikipedia.
You have done the research. There’s a ton of information that is waiting to be typed and printed. But wait! Don’t drown before you enter the water. Prepare the final outline of the report which will be the chart of waypoints to help you navigate from start to finish. The outline is the blueprint. It will give you a bird’s eye view of the land and also show you where you need to fill in the details.
The structure of an idea report can include the following elements:
Microsoft Word’s Document Outline is a powerful feature that can help you organize a document even before you start filling it with research. Take advantage of brainstorming and mind-mapping templates too.
Once you have structured your report, it is time to fill out the headers with content. I personally find it best to tackle a little bit of each section, and then bulk it up with information. You can do that if you want, or finish each section as you go down the report structure. Make sure you focus on presenting your ideas and using supportive evidence rather than spelling and grammar first. Outline your argument and write a few sentences that cast your main ideas. If you find something worth quoting, quote it.
Once the majority of your text is written, it is now time to read through it and make sure it flows well. Make sure you guide the reader’s understanding with transition words such as “This information shows…”, “In other words…”, “Similarly…” and do highlight relevant and key points.
Finally, spend time to proofread, check for grammar and spelling, and double-check all relevant information and its logical flow. It is best to leave at least one day to check and proofread your work. Don’t try to edit it straight after you think you have finished, as you will tend to miss read what you have written. Get some sleep, and proofread it the next day.
Before you go and submit or hand in your report that you have worked so hard on, make sure you have done the following:
Now, let’s launch Microsoft Word and take you through the features that will help piece together the draft of your report and present it as a professional document.
Take these as bite-sized tips and master them one by one.
Microsoft Word is a big howitzer with many nuts and bolts. Let’s focus on the key skill sets and the tools you will need to plan, prepare, and present the professional report. The Microsoft Word features we will cover below are also productivity shortcuts that will make your job easier.
Tip: Use Microsoft Word 2016’s “Tell Me” assistant to learn more about new features in the Office suite.
Let’s start with three preliminary tools…
For most of us, when we need to copy text or an image into Word, the CTRL+V shortcut does just fine. But sometimes we might want to paste the copied data into another format, such as Excel data as an image. With the Paste Special command you can discard or specify the format when you paste a picture, presentation data, table, or object from any other program into Word.
You will work a lot with Excel tables and charts in a professional document.
If you just copy what you want and click paste, you will notice that it will insert the data as tables. But, if it is a large area of cells you want to paste, and you do not want to edit it, you may want to paste it as an image, with the extra option to edit it.
In Microsoft Excel: Select and highlight the cells that you want to copy > Press CTRL+C.
In Microsoft Word: Go to Home > Paste > Paste Special. Select Paste Special and from the dialog select Microsoft Office Excel Worksheet Object.
You can resize the data as it was an image, and if you double click, you will be able to edit the values. You can change the table or chart and redesign it. And, if you update the data in the chart or table in Excel, you can automatically refresh the chart in Word.
Try the right-click context menu too. The Paste Special menu pops up:
There are more options to import data from Excel into Word. The Microsoft Office Support page also describes them in detail.
Yes, there is Google and Wikipedia. But constantly switching from Word to your browser can hamper your productivity. Office 2016 brings in powerful research integration to this grunt work. The Researcher can not only help you find content from within Microsoft Word but also help you quickly add citations. It uses the Bing Knowledge Graph to find the right content to support your document.
Go to Ribbon > References tab and c Choose Researcher. A pane will open on the right with the search options.
Type a keyword for the topic want to search for and press Enter.
The Results pane shows a list of sources you can use in your document. Choose a topic to explore in detail.
Add the topic to your Microsoft Word document with a click on the plus sign on the top-right. You can also click the plus sign on any result to cite the source in your research document. The cite source helps you support your research with web sources and books.
As we will see later, an annotated bibliography is one of the toughest parts of a document. The Researcher is an intelligent assistant who steps in.
Let’s take for granted that your professional report will be a long and complex work. You can split the Word window into two panes so that you can view two different parts of a document at the same time. It is a valuable time saver when you want to copy and paste parts from one place to another or refer to one part of the document while working in another.
Go to Ribbon > View tab > Split.
To remove the split, click on Remove Split in the same tab.
The Windows group gives you several options to change the way you work with two or more documents. The features are self-explanatory.
To scroll both documents at the same time, click Synchronous Scrolling in the Window group on the View tab. You can also click on View Side by Side to put two parts of the document next to each other.
Tip: Use Split View to display two different layouts – for instance, Print and Outline. Set the split. Then, click in the pane that you want to change, and then select a different layout on the View tab.
The presentation of a report is what gets someone to read a report in the first place, and that is why it is crucial that your report is well presented. If you had the choice of four reports to read, what will you choose?
You will pick up the fourth report because it will pull you towards it by the visual appearance alone.
The front cover is not the only reason. A well-designed report is easier to read. It is also easier to scan when you don’t have time to read. That is why you need to spend some time on your headers and footers, and the different styles and themes. In short – the formatting of every element in the report.
Formatting may seem like a difficult chore, but it is a fun exercise that will exercise all your creative muscles. The key takeaways will be the skills you can apply to anything in Microsoft Office going forward. And the time you will save with all the productivity tips learned here.
Microsoft Word 2016 has a wealthy set of features. These are only some of the ways that your report design can stand out from the rest and be professional. So, let’s break down the layout and design skills.
This section will cover these features step-by-step:
(Format the Content)
The first page is the first point of contact with your reader. It is also your opportunity to make a favorable impression. Don’t let your lack of artistic skills be an excuse because Word takes up the job with its in-built gallery of title pages. All you have to do is marry one to the theme of the report.
Microsoft Word 2016 offers you 16 pre-formatted templates and three more on Office.com.
Go to Insert > Pages Group > Cover Page.
The cover page appears at the beginning of the document by default.
As there are only 16 “official” templates on offer, you may find that all your other peers have the same cover page. So, why not customize it, and make it a bit more unique.
You can design a title page (or cover page) in Microsoft Word that can be an original in the stack. Save it as a template or easily change the design on the fly.
Casual readers scan. Good readers scan first and then dive deep. A table of contents provides the waypoints that help both. When it is a long and complicated document, wouldn’t you rather check the lay of the land before you head to the section that interests you?
Consider a Table of Contents (TOC) if your document is more than 10 pages long. You should first make sure you don’t need to rearrange any pages in your document before creating the TOC.
In Microsoft Word, you don’t have to write the entire TOC by hand. There’s a Table of Contents automatic tool under the References tab which takes your outline and designs it for you. Also, you can easily keep it updated when you want to change something.
There are also templates you can download and fit it around the nature of the content. For instance, a TOC for a thesis will look different from that of a company’s annual report.
We have a complete tutorial on how to create a table of contents page in Word.
The gist of it is this:
Create the outline and use heading styles to organize the hierarchy. Apply the automatic TOC tool to the heading styles. Word 2016 searches for those headings and then inserts the table of contents into your document. Then you can automatically update your TOC if you make changes in your document.
For more hands-on control, you can also use the Manual Table of Contents style. Word inserts placeholder text and you have to insert and format each content in the list.
Headers and Footers are important in reports as the main purpose is to provide information about the report on every page. They are the common display areas for page numbers. The header of the document should contain the title of the report, and possibly the name of who created it. The title of the current section is helpful.
The footer, on the other hand, should include the page numbers, date of publication, and other administrative information that is required. Do note that some style guides have special guidelines for headers and footers.
Let’s start with the header in your document and give it a unique look.
Select Insert, then select either Header or Footer from the group. The built-in gallery shows you several options you can choose from.
The header and footer space is inserted in your document with placeholder text or table. The Header & Footer Tools opens on the Ribbon for other formatting work like the date, time, or picture.
Enter your text and then select Close Header and Footer.
You can start with a blank header and footer. If you have the design skills, use the Header & Footer Tools to design your own. Master the header and footer space if you want to create custom letterheads for your organization. You can use brand elements like company or organization logos at the top and neatly formatted footnotes at the bottom
Let’s try with and modify one of the inbuilt headers. I selected Facet from the gallery.
The final look took two minutes to put together with simple text effects and an icon sourced from the Microsoft Office icon gallery.
The header and footer are in place. But, how do you know where you are in the document? Insert page numbers as the next important signpost.
Page numbers look best in the footer (unlike in the header as in the image above). You can add a basic page number from the Insert > Page Number button on the Ribbon. You can also add it from the Design tab that appears when you add the header and the footer.
You have a lot of control over page numbers. Choose from a wide range of number formats and customize them to your needs. In this case, we are adding the number to the footer, but you can put them at the top or even at the margins. In this example, I have placed the page number at the bottom left. But, I would like to change the default look and the format.
For example: Using a “Page X of XXX” makes for a better indicator on a long document.
Select the page number. Go to Insert > Quick Parts. From the drop-down menu, select Field. You can also reach the Field dialog from the Header and Footer Design tab.
Choose NumPages from the long list of field names. From the box on the right, you can pick a specific format. I selected the usual 1, 2, 3. Click OK, and the number of the number of pages will appear. Now all you have to do is add your text such as Page X of XXX, and change the look of the numbers with the usual text formatting tools available from the Home tab.
It now looks like this:
Design the look on any page number in your document and Word updates all the remaining automatically. Page numbers are the most common elements in a footer, but it can also hold any other information like the header. From the options in the Insert group, you can add the date and time, document info, pictures, and more to your header or footer.
Next, we’re heading into formatting the content.
The visual draw of your professional report comes together with the “beautification” you apply to the content. Formatting is also an essential step for a document that flows well. So, you must focus a lot of energy on picking the right font, paragraph space, and the colors.
Don’t worry. Even, the artistically challenged will find this part easy because Microsoft Word comes packaged with default themes and visual styles. Let’s start with the most basic element of a document.
Your choice of font in a professional Word report not only determines how the text stands out but also how it is printed. You want both for maximum impact.
You can apply a typeface (i.e. the visual look of the font) to either an entire document or to specific parts of a document. All font choices are available from the Home tab. Go to Home > Font.
The default font in Microsoft Word 2016 is Calibri. Look beyond that as you have lots of others to choose from. If you choose Times New Roman, you may be considered lazy, if you choose Windings, well… I don’t think I need to explain that. So make sure you choose a font that is easy to read and suits the report. To play it safe, pick from one of these professional-looking Google fonts; they’re available for free.
Tip: Baskerville and Georgia are good alternatives to the over-used Times New Roman
Try different font pairing for the body text and Headings (and Subheadings). Several websites like FontJoy and TypeWolf will help you experiment with font pairings. You can download and use custom fonts too. But remember the thumb-rule — never use more than three different typefaces in a document.
For that extra bit of pizazz, try a drop cap to enhance your text.
If you want to have your lines double spaced, or single spaced, you need to change the format of the paragraphs. By changing the spacing, you can make a document easier to read or give the impression that it is longer and that you have put more work into it.
To change the paragraph for the whole document, it is best that you select each block of text; otherwise, if you are using headers in your report, they will change too. Another better option is if you customize the particular style you are using to format the paragraph.
To do this, go to Home > Styles. Right click on the style you want to change and select Modify. Click on Format > Paragraph which is at the bottom of the dialog box. Now, change the spacing, indentation, and alignment for the paragraph. Click OK to close the dialogs.
When you want to change a smaller portion of the document, select what you want to change. Right click on the highlighted text and select Paragraph. The same dialog box as above will appear.
A page break — by its very name — splits a continuous block of text across two pages. Page breaks are important structural elements for long documents. Word automatically inserts a page break at the end of the page. But in a long document, you can place page breaks where you want them.
To insert a manual page break, click Insert > Page Break. (Keyboard shortcut: CTRL + Enter)
A page break looks like this when you click on the Show/Hide command in the Paragraph group.
But what if you want to keep a bunch of lines together on a page or column and not have them separate because of a page break? The layout is in your control. Click the tiny arrow you see in the bottom right of the Paragraph group.
In the Paragraph box, click Line and Page Breaks. Select from these four pagination options:
We’ve also shown how to remove page breaks when necessary.
Styles and themes are perhaps two of the more underused features in Microsoft Word. But I think you should use them at every opportunity to save a lot of time.
But what is the difference between a theme and a style? Microsoft says:
Themes provide a quick way to change the overall color and fonts. If you want to change text formatting quickly, Word Styles are the most effective tools.
So, as themes control the general look with color, effects, and fonts – start with a good theme for your document first. Then, use Styles to dig into the specific portions you want to change the appearance for.
For Themes: Go to the Design tab. Pick a theme from the gallery. You can see previews of what the color combination is like.
For Styles: Select the part of the text you want to change. Go to the Styles group on the Home tab. You can see previews of what they look like. Choose the Style that is suitable for your content. For instance, choose a heading style for the headings in your document. Or, a particular style for any quotes. You can also modify an existing style and create new styles from scratch.
Every picture, chart, or illustration needs a caption to clearly describe it. It is a single line of text, usually located below a graphic. Captions are also an important reference when you need to mention them in another place. Many documents omit this small detail.
It is easy to add a caption. Right-click the illustration you want to add a caption to. Select Add Caption.
In the dialog box, add your caption text and configure the remaining options. Captions can be automatically referenced in Word.
Professional documents can get repetitive. This is why you should start using Quick Parts for boilerplate content you reuse all the time. For instance, let’s say there is a contract clause you include with every document. Or, some introductory information. Instead of repeated copy-paste, save them as Quick Parts and re-use them again and again.
Quick Parts is also a type of building block. You can see the gallery of all reusable blocks of content in the Building Block Organizer.
Save and reuse your own Quick Parts in two steps:
Just as easily, you can re-use the saved snippet of content.
Place your cursor where you want to insert a selection from the Quick Parts Gallery. Go to Insert > Text group > Quick Parts. Then click the sentence, phrase, or other saved selection you want to reuse.
You will notice three other categories in the Quick Parts menu.
AutoText: Word 2016 has retained the old AutoText feature. It works like Quick Parts for any block of text that you use a great deal. Example: A note you want to use with every document.
Document Property: A set of constant properties that you can include with every document. Example: Company name or author.
Fields: These are predefined elements that update automatically. Example: Date, time, page numbers etc.
Remember, entries for document property can sometimes include information you wouldn’t want to share with everyone. So, keep a close eye on these fields and remove the hidden personal data whenever required.
Page borders look good not only on flyers and invitations. If done right, they can add a touch of class to a document. A variety of line styles and widths and art borders are available from the Design menu on the Ribbon.
Go to Design > Page Borders.
In the Borders and Shading box, use the Page Border tab to design your border.
The settings are self-explanatory. Try Shadow or 3-D with the right colors to add a subtle but elegant border. The Art styles with their clip-art borders might be too garish for professional documents.
Use the four corner buttons in the Preview window to select the sides of the page to draw borders. Click these buttons to remove or add borders, as you wish.
Place the cursor on the first page of a document if you want to put a border around only the first page. You can also put borders around certain pages in a section. Place the cursor in the section — either in the first page of that section or in a subsequent page.
A Word report can seem like an unmanageable chore. It’s like organizing a million piles of hay into neat little stacks. The idea is to know precisely which stack has the pin you are looking for. These features are meant to make it easier.
When writing large documents such as a report that contains a lot of information, a contents page may not be enough. An Index should appear at the end of the document, with page numbers to keywords and information in the report. Create an index to help the reader reference the right information with just the page number.
Make an index if your document has more than 20 pages. Microsoft Word 2016 doesn’t let the process overwhelm you. It basically has two parts:
You can scroll through the finished document and mark the words or phrases you want to include in the index or mark them as you go along. Either way, select the text you’d like to use as an index entry or click where you want to insert the entry.
1. Click References > Mark Entry.
2. Edit the text in the Mark Index Entry dialog box. You can also add a sub-entry which further defines the main word you used in the index. You can add multiple levels and each appears indented under the main entry.
3. Under Options, you can also create a cross-reference to another main entry. A reader can use this to refer related information elsewhere in the same document.
4. Use the Page number format to decide on the appearance of the page numbers in the index.
5. Click Mark to mark the index entry. To mark this text everywhere it shows up in the document, click Mark All.
6. Repeat the process for all the words and phrases you want to include in the index.
You have now built your index. Insert it at the right place towards the end of the document.
1. Click on the page where you want to insert the index.
2. Click References > Insert Index.
3. The Index dialog box is displayed. Here you can choose to format the text entries, page numbers, tabs, and leader characters.
4. Choose the appearance from the different formats in the list and check the Preview window on the right. Remember, the Preview window doesn’t show you actual index. It is just a “simulation” of how it will look like.
5. Click OK. Your Index is now ready.
Sometimes, you may need to add more entries to the index after you have inserted it on the page. Mark the entry and go to References > Update index to include the new mentions.
Also, add a heading for the index because Word doesn’t do it automatically.
Your document is almost done. Now, you need to credit all the other research work and ideas which you have referenced in your document. It’s time for a bibliography.
A company report might not need a bibliography but an academic paper isn’t finished without one. The bibliography is one of the most painstaking jobs in an academic report. You need to have all your citations in order before you sit down to frame the bibliography. Also, decide on the citation style (typically MLA, APA, or Chicago-style) as per the guidelines of your subject.
Don’t hesitate to take advantage of third-party citation and bibliography generators for constructing this section.
But, Microsoft Word 2016 has a complete toolset to make this process as painless as possible. So, go to the point in the document where you would like to place the bibliography. It’s good if you have at least one citation to include, but even if you don’t, Word 2016 lets you use a placeholder citation and fill in the sources later.
Click References > Bibliography.
Word offers a few bibliography styles that differ only in their heading names. Choose the appropriate style and then insert citations from the button in the Citations & Bibliography group.
The bibliography tool has a few steps to it. For the sake of brevity, I will direct you to the excellent Microsoft Office help page which is a step-by-step guide.
Some academic papers will ask you to create an annotated bibliography. It is a more fleshed out version of a bibliography with a list of citations to journals, books, articles, and other documents followed by a brief paragraph. The paragraph is a description of the source and how it supports your paper.
You can use a cross-reference to help the reader navigate through a long document. At any point in a document, you can tell the reader to refer back to a heading, page number, image, chart, footnote, endnote, and paragraph. A cross-reference link is a neat way to connect related information together. The reader just has to click on the link to go that snippet of information.
Here’s how you begin:
1. Select the place for the cross-reference and type the text that tells the reader about it. For instance: “Refer to Chart 3 for future trends.”
2. Go to Insert > Cross-reference.
3. In the Reference type box, click the drop-down list to select what you want to link to.
4. The options in the Insert Reference to drop-down will change according to your choice above.
5. In the For Which field, go through the choices and tell Word the exact information to link to.
6. Check the Insert as hyperlink box to create the hyperlink for the referenced information.
7. Click on Insert to include the cross-reference in the document.
Remember, our mention of captions? You can make cross-references to equations, figures, graphs, and tables if you used captions below them.
Word cannot create a cross-reference for something that does not exist. Word will let you know about these errors and also update the cross-references automatically when you change the page number or text of the referenced item.
A professional report can be a solitary job or you can take the help of a team to prepare the first draft. The humble Comment is one of the most underused tools of a Word document. It is displayed as a rectangular colored balloon in the margin or in the Reviewing Pane.
You can use comments as small “stickies” or self-notes. Leave little notes to yourself in the margins as you write, edit, and revise your way through a report or a manuscript. Be creative – add extra links to other resources, use them for tips and pointers, link to different parts of a document, or set up a feedback link for your readers. And when you finalize, you can easily remove all comments in Word.
Microsoft Word 2016 is also an enhanced collaborative writing tool. Comments play a huge role in communicating feedback across a team. Here’s how the comment system works…
1. Highlight the text you want to add a comment to or click at the end of a text block.
2. Go to Insert > Comment. Type your comment in the box. The comments appear in the markup area on the right. The Print Layout view is usually the best way to see the comments alongside the text.
3. Go to the Review tab and see more options for comments. This tab also shows all the controls for tracking changes and comments in a collaborative document. Use the Markup options to display or hide the comments. For instance: No Markup will hide the comments and the markup area on the right.
Once the bulk of your report is completed and saved, it is time to finalize your report. When I say finalize, I don’t mean proofread it. That should be done too. Now, you have to take the security measures to protect the report from unauthorized changes and plagiarism.
These security measures will give an extra level of authenticity to your electronic file before you share it.
This section will cover:
You can add text signature for a personal touch to the report. But a simple text signature does not need any authentication. A digital signature is the better way to protect your document from unauthorized access. A digital signature confirms that the document came from the signer and hasn’t been tampered in any way.
Let’s create a signature line in Microsoft Word 2016.
In the document, place your cursor where you want to create a signature line.
1. Go to Insert > Text group > Signature Line and click Microsoft Office Signature Line.
2. The Signature Setup dialog box is displayed. Fill the fields as indicated. If you are sending the document to someone else for signing, add instructions for the signer in the field reserved for it (Instructions to the signer). The signer can also add give the purpose for the signing if the Allow the signer to add comments in the Sign dialog box is checked.
3. Click on OK and the document will now display a placeholder for the signature.
Enter a signature:
When you need to sign a document with a digital signature, go to the signature line and right-click on it.
You will be prompted to sign with a digital ID. If you don’t have one, Microsoft will tell you to get one from a signature service partner.
If you don’t have a digital ID, you can just insert a textual representation of a signature line. You can use a written signature or an image that doesn’t require authentication.
A Microsoft Word watermark is a “fake” but still useful visual indicator for the status of the document. For instance, you can use a watermark that says “Drafts” to differentiate it from the final version of the document. Or, use the watermark to suggest the document is “Copyrighted” or “Confidential”.
The “Draft” mark is the most common. But, Microsoft Word gives you several other watermarks to choose from.
1. Go to Design > Page Background and choose Watermark. The Watermark button will be enabled in the Print view only.
2. You can choose a picture or a text watermark from the gallery. Both horizontal and diagonal versions are available. The dialog box gives you all the customization options for the final look of the watermark. Try different fonts, layouts, sizes, and colors.
3. You can type your own text in the Text field to create your custom watermark.
4. Choose OK to apply the watermark to your document. Word automatically applies the watermark to every page except the title page.
A professional report by its nature should not need to be edited by its readers. Converting the document to a PDF is one way. But, you can also apply a few more restrictions in Microsoft Word and prevent accidental modification or omission of any kind.
There are three ways to protect a document.
First — Make your document “read only”.
This ensures that your document can only be read or copied. It won’t prevent anyone from copying the file and making changes to the copy.
1. Go to the File tab > Info > Protect Document > Mark as Final.
2. When readers open a document, a bar on top will prompt readers to treat this document as read only. But, they can click on “Edit Anyway” to open the document in Edit mode.
Second — Password Protect Your Document.
Protect your document from unwanted edits with a password barrier.
1. Under Protect Document, choose Encrypt with Password. Type a password and click OK.
2. In the Confirm Password box, type the password again, and then click OK. The document will open with the reader prompted for a password.
Microsoft uses the AES (Advanced Encryption Standard), 128-bit key length, SHA1 (a cryptographic hashing algorithm which generates an almost unique 160-bit key to replace the plaintext), and CBC (cipher block chaining) to give a hacker a well-deserved headache.
Third — Restrict Editing.
This control feature helps you as the author decide which parts of the document others can edit and which will be locked out. Think of it as the bouncer who lets the VIPs in but otherwise bars the door for the common folk.
1. Go to Review > Restrict Editing.
2. Under Editing restrictions, check Allow only this type of editing in the document, and make sure the list says No changes (Read only).
No changes (Read only) is the default restriction type. For a different restriction level for the document, click the menu and select from Tracked changes, Comments, or Filling in forms.
3. To free some sections from the editing blockade, select the sections for editing without restrictions. To select more than one area, click CTRL while selecting the area using the mouse.
4. You can check Everyone under Exceptions (optional) in the Restrict Editing panel. Or, click More users… and allow only specific users to modify the sections. The allowable areas will be marked with square brackets.
5. Click Yes, Start Enforcing Protection.
Now, type a unique password in the box that opens. You have to type it again to confirm it.
The password is optional. But it ensures that no one can just click Stop Protection and edit the document. If you are still paranoid, go ahead and encrypt your Microsoft Word document as we did in the second process above.
The Portable Document Format comes with many advantages. Not least is its cross-platform compatibility across all computers. Your document is ready and now you need to share it or send it across to be printed. Many professional reports — for instance, a legal document — need to retain the format as intended.
Save or convert a copy to PDF. Microsoft Word 2016 does not need any third-party add-ins.
Go to File > Export > Create PDF/XPS.
Remember, your Word document may contain sensitive information that you do not want to be included in the PDF. Remove it before you publish to PDF. In the Publish as PDF or XPS window, choose Options. Then select Document and clear Document properties. Set any other options you want and choose OK.
Browse to where you want to save the file and click on Publish.
You are close to the finishing line. The report is ready to be handed over to your readers. But there’s one last job left.
Turn the pages and make sure (again) that your report is reader-friendly. Approach it with the eye of the reader. Have you organized your thoughts and written persuasively? Does the information flow well with the charts and illustrations? Can they skim through and find the information quickly? Is the text readable? Use the readability score to gauge the readability level of your documents as a final step.
You also might have noticed we didn’t cover some aspects of Microsoft Word. For instance, Microsoft Word Tables are an important tool for data display. Or, the power of lists in information management.
Microsoft Word is more than a quarter of a century old, and packed with little features. At MakeUseOf, we have covered every nook and cranny of this beast. So, do use our resources to learn more about this software for free. Each new feature of Microsoft Word learned will make your life easier.
The post How to Create Professional Reports and Documents in Microsoft Word appeared first on VVDesigns.]]>Planning to develop in JavaScript? You need a framework of libraries for efficient coding. But which is the most popular JavaScript framework?
In May 2021, Stack Overflow conducted the 2021 Developer survey to learn about what tools developers are using, how they are learning them, and their opinions. Over 80,000 developers took part in the survey, 69.7% of those being developers by profession.
JavaScript is the most popular programming language in the survey. This article highlights the findings on JavaScript and its frameworks. Hopefully, it will shed a light on what technology you should keep an eye on in 2022.
According to the developer survey by Stack Overflow, JavaScript continues to maintain its position as the most popular programming language with over 68% of respondents stating they used it extensively for development. Alongside HTML and CSS, JavaScript is one of the core technologies used on the web.
JavaScript is also used in other development environments like Node.js for backend development, Apache CouchDB, and Adobe Acrobat. JavaScript’s usages have also extended to mobile, game, and desktop development. Its increasing adoption can be attributed to the fact that it is easy to learn, implement, and receives a ton of support from its developer community.
In the JavaScript ecosystem, the list of JavaScript frameworks keeps on growing. Frameworks are a collection of pre-built JavaScript code that is used to make development easy. When choosing a framework, consider your project features, what the framework is good at, and its learning process.
Below are the five most popular JavaScript frameworks.
React surpassed jQuery as the most popular web framework in 2022 with over 40% of professional developers saying they use it extensively. It is an open-source JavaScript library developed by Facebook used to build highly responsive user interfaces. It is declarative and component-based meaning you can reuse components to create complex UIs in a short time.
For new developers, React is easier to learn and use compared to other frameworks like Angular. It has extensive documentation, guides, and a growing community that reduces the learning curve. React is constantly evolving which can be a downside since developers have to keep on relearning the new features. Examples of large websites built with React are Airbnb, Dropbox, Asana, and BBC.
jQuery was the second most popular web framework. It is an open-source JavaScript library that is used to simplify interaction with the DOM (Document Object Model). It helps you navigate the DOM tree easily.
jQuery is easy to learn and has been around since 2006 and therefore has a large developer community. jQuery however cannot compare with modern web frameworks with advanced features. It is useful for simple applications but can lead to a large codebase if used to build big applications.
Angular (26.23%) was the third most popular JavaScript framework after jQuery (34.52%). It is an open-source framework launched by Google in 2016. It can be used on the frontend or backend to create dynamic Single Page Apps (SPAs) and Progressive Web Apps (PWAs) with faster page loads.
Angular offers features such as two-way data binding which enables real-time synchronization between the model and view, has built-in dependency injection, and supports TypeScript. However, it has a steeper learning curve compared to React. Examples of websites created with Angular are Freelancer, IBM, and PayPal.
Express (also Express.js) came in at the fourth position among web frameworks at 23.6%. It is a minimal and fast JavaScript framework for backend development. It is used with Node.js, a JavaScript runtime, to create efficient web applications fast.
Express provides an easy way for managing routing, setting up middleware packages, and integrating plugins in your server-side code. With Express, you can create RESTful APIs to integrate with other apps and dynamically serve static HTML files to the web. Examples of companies using Express in the codebase are Twitter, Intuit, and Accenture.
Vue.js was the fifth most popular JavaScript framework. It is an open-source framework designed to improve on the features of frontend frameworks like Angular and React. For instance, it has both the virtual DOM used in React and two-way binding as in Angular.
With Vue.js, you can build PWAs and SPAs quickly and efficiently. Vue.js is a good first JavaScript for beginners as it has good documentation and is easy to learn. Examples of websites built using Vue.js are Upwork, Adobe, and Grammarly.
It is worth noting that Svelte was in the top position as the most loved web framework as per 71.47% of the respondents and surpassed React at 69.28%.
Svelte is blazing fast compared to React and other dominant frameworks like Angular and Vue.js. This is attributed to the fact that Svelte compiles code down to optimized Vanilla JavaScript and you don’t have to ship the overhead framework code. With Sapper which is similar to Next.js in React and Svelte Native for mobile development, Svelte will probably continue increasing in popularity.
Examples of companies using Svelte for their websites are The New York Times, Nesta, and Rakuten.
While Svelte was the most loved framework, AngularJS was the least loved. It was dreaded by 76.82% of the respondents. Perhaps this is because as of December 2021, Google discontinued AngularJS long-term support after providing it for over three years. If you are using AngularJS in your application, you will need to migrate to Angular or other frameworks because as time progresses, your application can crash due to a lack of updates.
The popularity of a framework might signify a large development ecosystem that can make learning easier. However, that should not be the only factor you consider when choosing a framework. Always consider where you want to use that framework. The design and features of your application should come first before the choice of development tool. Next, research the framework to learn about its features and complexities.
This article has highlighted the five most popular JavaScript frameworks according to StackOverflow’s 2021 developer survey. It provides a good start for making a decision on the technology you will use to build your solution.
The post The Most Popular JavaScript Frameworks of 2022 appeared first on VVDesigns.]]>According to the survey, 80% of the U.S. population said they are likely to visit a restaurant’s website before they dine-in, order takeout or delivery. The most attention-grabbing result is 65% of those surveyed indicated that they have been disappointed because of a hardly navigated and outdated restaurant site.
As you can see, websites are commonplace for people who are looking for a place to dine out. A well-designed website will leave a good impression on your customers-to-be. In other words, this will lead them into your door with little effort. If you feel stuck in the designing step, get some inspiration from these web design examples for restaurants.
The importance of having a proper website has increased even more during the pandemic period. So, restaurant owners started to look around to find the best website builder for restaurants. What we mean by saying “the best” is the solution that meets all your business needs.
Before we move on to analyzing the best builders for restaurants in a detailed way, we would like to mention a few evaluation points.
In this article, we take a closer look at each website builder in many aspects. Such as:
No doubt that industry-specific features are the top-of-mind criteria for choosing the best platform for a restaurant website. A website builder should offer extensive restaurant specific templates, customizable menus, prebuilt menu pages, reservation booking systems and online ordering and payments methods.
Long story short, every restaurant owner desires a solution that offers effective features with affordable pricing plans. Some may come with handy features but are a bit pricey or vice versa. Also, it would be better not to rely on a free plan too much if you would like to create professional-looking websites.
Still can hear your inner voice asking “How can I choose the best website builder for my restaurant?”. So, it is better to ask yourself the following questions:
If something has started to form in your mind thanks to these questions, let’s take a closer look at the best solutions for your business.
If you ended up here, you may be overflowing with a dozen of options. The good news is that we have made a selection only of the best website builder for restaurants to ease the process for you! Here are the top solutions to get help from while building a website:
Anyone who looks for a website builder for restaurants must have come across Wix at least once. Wix is known as the best eCommerce restaurant builder that comes with fantastic features. The all in one platform provides built-in payment systems, 800+ restaurant specific templates and great social media integrations.
While offering a free domain and hosting, Wix also adds great value to the restaurants that need extensive marketing tools. Not only limited to this but it also optimizes restaurant websites to rank better on search engines with SEO tools.

Moreover, if you face any type of issue Wix’s super friendly customer service put their hands on it at lightning speed. Not-so-well working customer service will cost you a lot. So, it is better to invest in a solution that provides 24/7 customer support to avoid discredit.
The pricing plans at Wix are divided into three parts:
Additional Note: Wix offers a 14-day free trial option.
When seeking for an easy to use website builder for restaurants, Duda shines out. It provides stylish restaurant specific templates and easily customizable site structures that suit your web design needs. What actually makes Duda shine is to provide a myriad of widgets. These widgets help make your website more customized easily.
With getting help from Duda’s beneficial world, you can power up your eCommerce restaurant website. As Duda offers several integrations with other platforms, it gives your sales operations and digital advertising campaigns a boost.

The customer support Duda provides is great for the ones who need to get a quick response. You can schedule a call or get in touch via email. If you encounter any technical or billing issues, there is dedicated customer support for you.
The prices at Duda are starting from $19 per month and it offers four different pricing options:
Additional Note: Duda offers a 14-day free plan with all of the features available in the Team plan.
Webflow makes it easier to create a restaurant website as it is a responsive website builder, CMS and hosting platform. The robust website builder offers a great number of responsive HTML5 website templates which can be customized easily. No matter what type of business you are running, Webflow helps create menus, customized order and booking forms, blogs and many other useful components.
Like Duda, Webflow also provides widgets. Can you see that the code-free solution makes customization easy as anything?
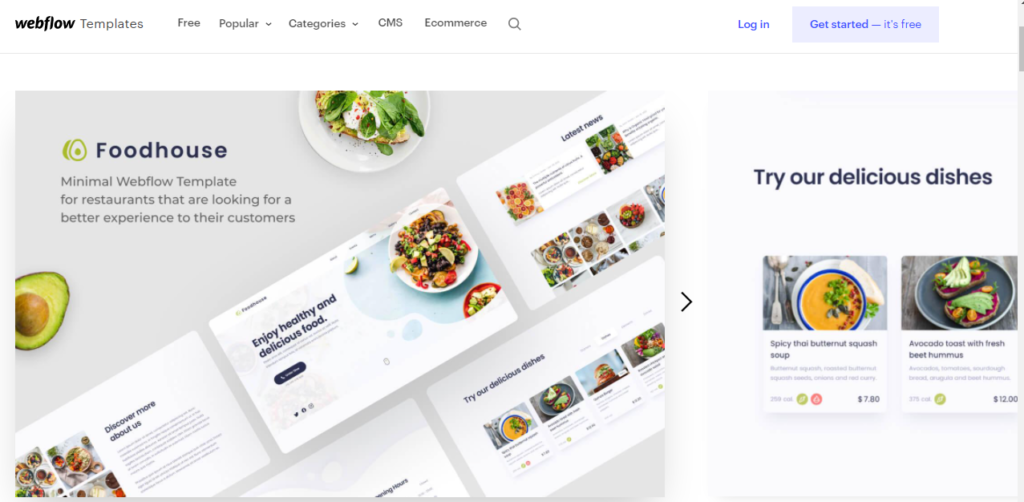
If you are planning to create an eCommerce restaurant website, Webflow can answer that need as well. The eCommerce related templates allow you to both provide information about your restaurant and sell your products online. Just like each solution in this best website builder for restaurants list, Webflow does not only help the technical side but also supports marketing, advertising and SEO related things.
At Webflow, you can start building your restaurant website for free. To make your website go live, you need to sign up for the additional plans:
Ecwid provides extensive industry specific solutions to create a restaurant website in minutes. Whether you create a new website or optimize your existing website, Ecwid will support you in every step of your journey.
Everything you need while launching your website is provided by the all-in-one platform of Ecwid. Creating custom food orders forms, designing informative sections, building booking forms, managing advertising campaigns and much more. Ecwid can handle everything.
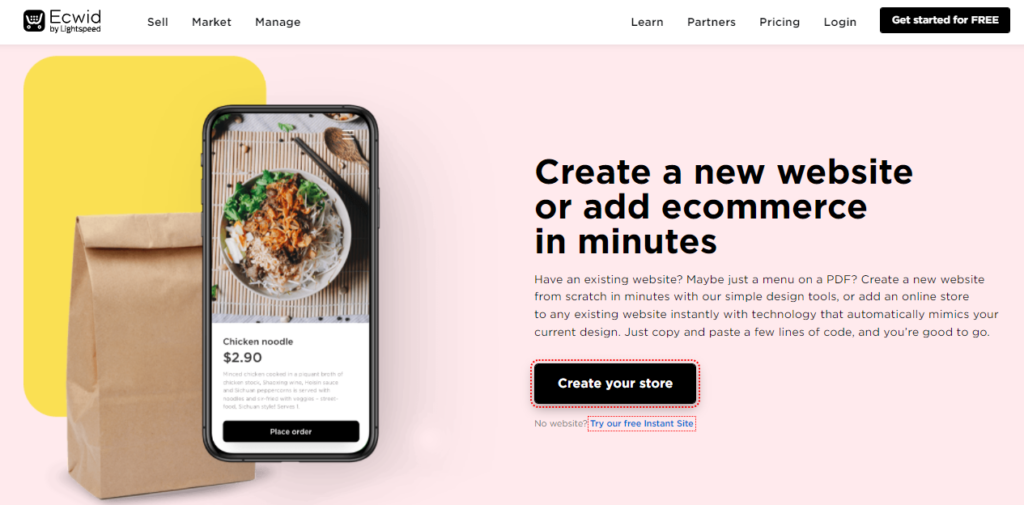
Moreover, once you create your restaurant website, you can connect it with all your social media accounts from one place. This ease of use makes managing your sales channels and advertising campaigns easier. Not only limited to this but it also helps keep your marketing & sales related customer data in one place. When you would like to conduct an email marketing campaign, things get just simpler!
It is possible to start selling with the free forever plan at Ecwid and you can upgrade it whenever you want:
“The best” is a relative concept as it totally shapes according to your needs. That’s why we don’t want to point out one solid option here. The questions above might help to decide on what you really expect from the best platform for a restaurant website.
We have tried to streamline your decision-making process by striping down the best options. Whether you are a small or large business, these best website builders for restaurants can suit your requirements in different aspects. The key consideration here is what features exactly you need.
The post 4 Best Website Builder Tools for Food & Beverage Industry appeared first on VVDesigns.]]>In this round of the series, we have a tool to create nice realistic shadows using CSS3, several new frameworks and libraries for React.js, and PHP.
Without further ado, let’s jump in to see the full list.
A little GUI tool that allows you to create a more realistic drop shadow for your website. You can customize several of the shadow properties such as the light position, color, and opacity. The tool will generate the CSS rules that you simply can copy and implement on your website.
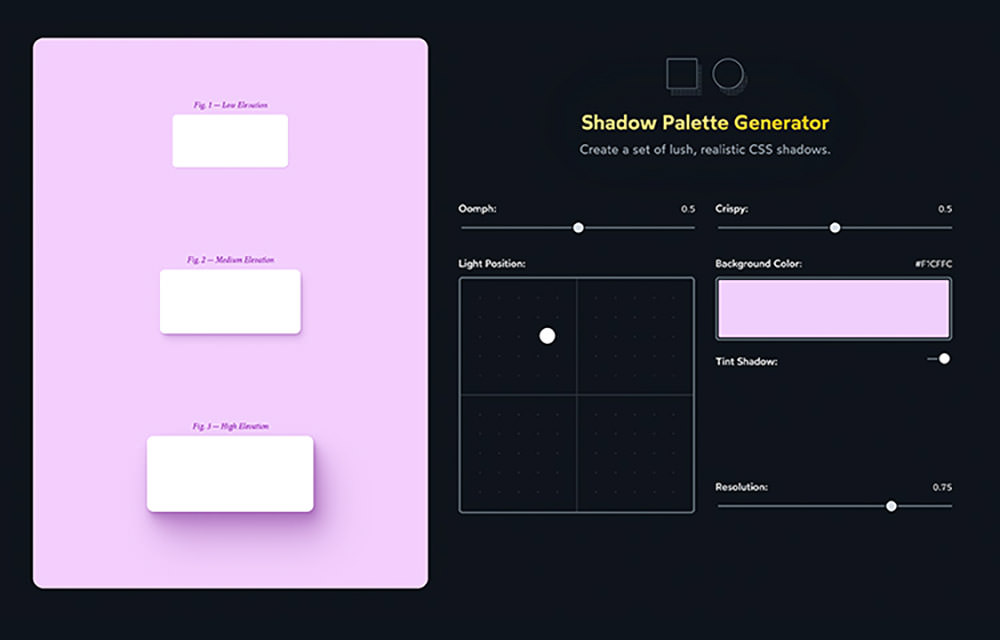
Relay is a service from Firefox that allows you to create an email alias of your real email address. You can create several email aliases of one email address, and use them when signing up on websites like e-Commerce, membership, and subscription, etc. It’s a great service to protect your online privacy further.

A little online app to convert raster images into SVG easily. The tool supports several image formats including JPG, PNG, and WebP. It’s built with the “Progressive Web App” approach, which means even if you’re offline, the app is still going to work. Simply drag-n-drop any image onto the app and it’s all set.


Google Chrome has just made an improvement to the DevTools with a feature called “Recorder”. This feature allows you to record your website interaction.
You can replay the recorded interaction or emulate it with certain environment and conditions. It provides a better measure on the real web application performance. This feature will be shipped as a beta feature on Chrome 97.

Remix is a new full-stack React.js framework that provides an abstraction to build a better website. It handles routing, error requests, and other tiny details of building a website with great user experience — out of the box. The framework will help web developers become more productive.

An official collection of tools from Redux that aims to make developing a website with Redux more efficient. It includes some utility functions and configs for common use cases.
This way you can be more productive, instead of befuddling with the configurations and the boilerplates, which can be a bit cumbersome.

A collection of tips, advice, and best practices for developing React.js application. Here you will learn a lot of topics surrounding app architecture, project structure, styling, state management, and a lot more. If want to improve your React.js skills, you should definitely have it bookmarked.
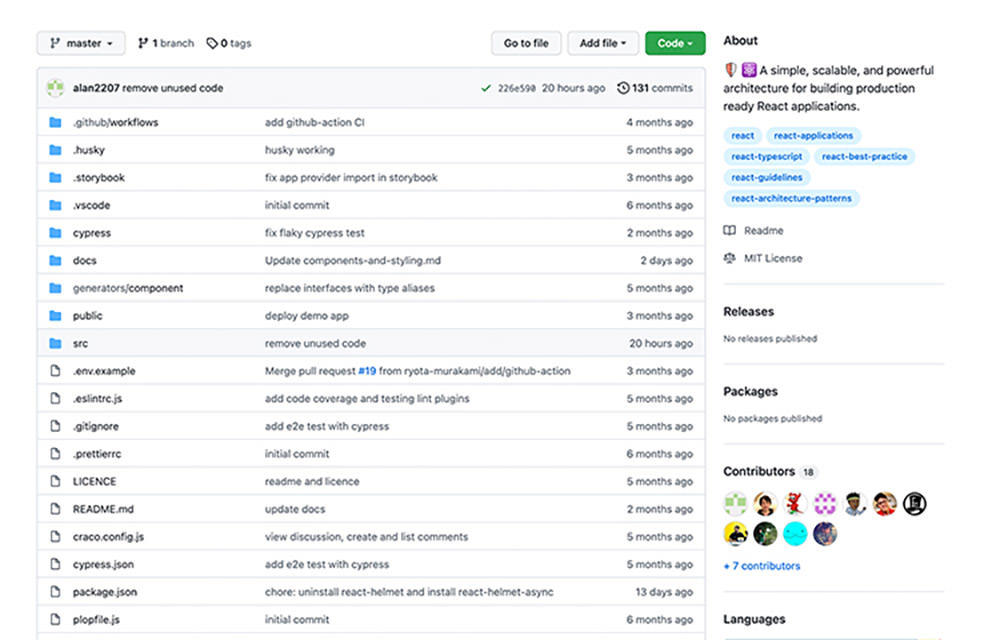
An open-source initiative from Apache, EChart is more than just a chart JavaScript library. It’s a robust collection of interactive charts with animations, and with an overall better visual. This allows you to convey the data to the users better than a static chart.
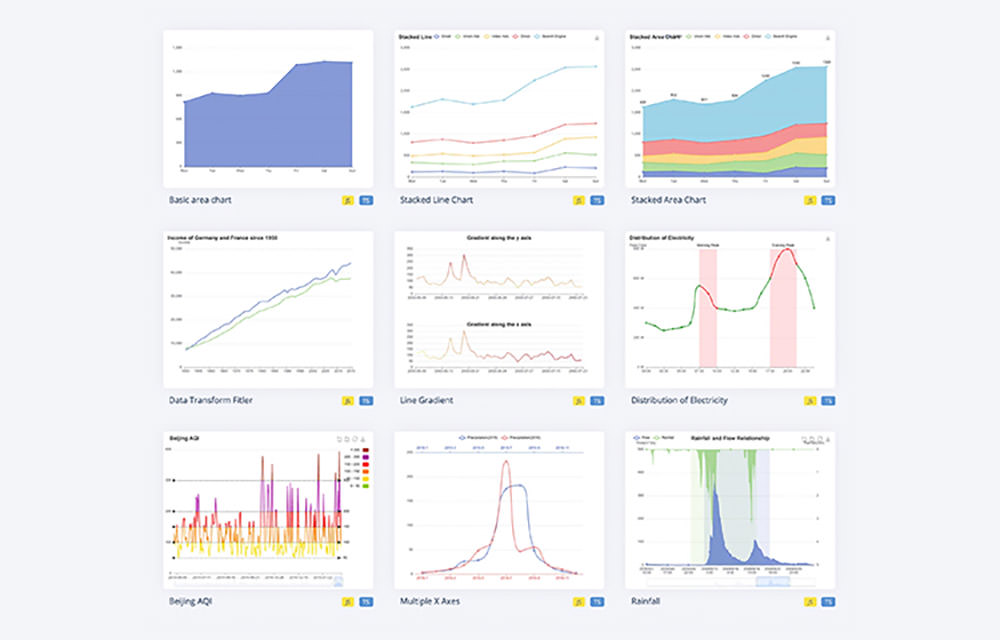
This resource contains a massive list of tools for designers from various categories. Here you can find tools for accessibility, prototyping, sketching, stock assets (icons, photots, etc), and a lot more. I’m pretty sure a lot of designers will find this list extremely useful.

Localstack is a fully-functioning local AWS cloud stack. This means you can develop, run and test your AWS application offline. It supports a number of AWS services including AWS Lambda, S3, DynamoDB, Kinesis, SQS, and SNS.
Having AWS stack run locally will help you speed up and simplify the testing and development workflow of your application.

A collection of resources like tools and content for those who’d like to start their journey as a business or startup founder. Being an entrepreneur is not easy. So get this list bookmarked and get prepared.

A PHP library that makes it easy to validate an email address. It provides several methods of validation including validation through the email RFC, DNS, or you can also write your own validation.

A Docker image that allows you to run a container with macOS. This is another cool stuff to help effectively test your application and ensure that it runs across different platforms.
An open-source alternative to Twilio. It allows you to run a stack application from VOIP, SMS, mail, chat, and video on your own server. A great alternative for those who’d like to have full control over their platform and the data.

Freescout is a lightweight help desk application built with Laravel. You can use it to help and manage your customer tickets, mailbox, and conversations. It’s open-source, free, and packed with features.
Freescout is overall a great alternative to the paid-platform app like Zendesk and Help Scout, especially if you value and need control over your data.
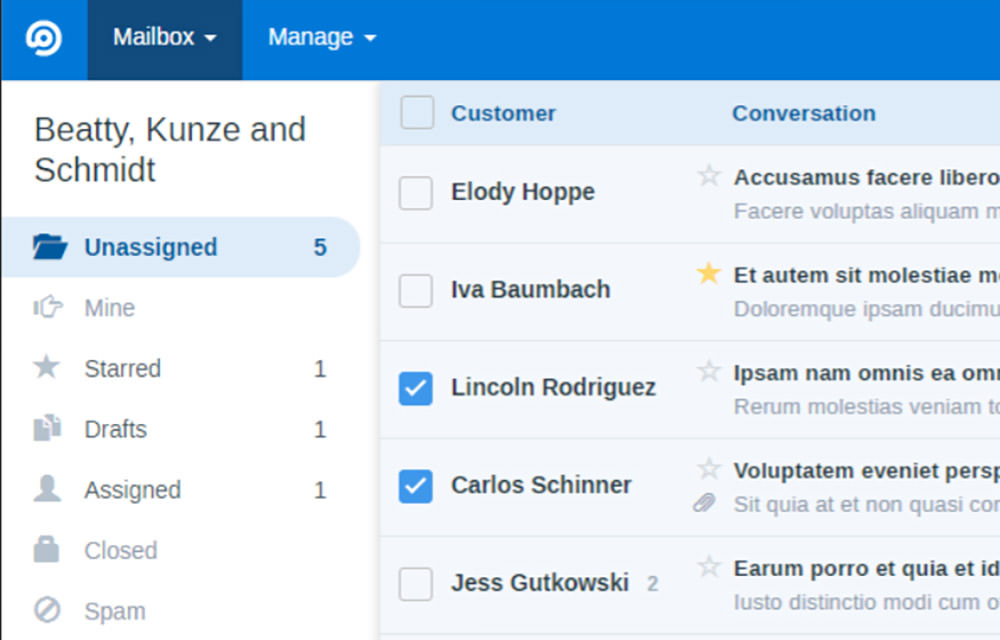
A robust PHP library to set up multitenancy in Laravel. This allows you to run a single Laravel application with multiple database connections. It works seamlessly and works out-of-the-box with several popular Laravel packages like Vapor, Nova, Livewire, and a lot more.

A modern JavaScript library to create a slider. Designed and intended to be used on mobile websites and apps. SwiperJS is framework agnostic which allows you to use any framework including jQuery and Zepto.
On top of that, it also provides official integration that allows it to work out-of-the-box with some of the most popular modern frameworks like Vue.js, React.js, Svelte and Angular.

If you’re looking to up your skills in creating JavaScript Sets, check out these methods.
A JavaScript Set is a collection of values that are unique.
Sets can hold values of any data type. It can be simple primitives, such as integers or strings, etc, or complex types like arrays or object literals. Values in the Set can only occur once.
In this article, you’ll learn eight JavaScript Set methods you should master today.
You can create a new Set object using the new Set() constructor. The Set object stores unique values of any data type. This constructor accepts an iterable object as a parameter.
const setObj = new Set([21, 34, 35, 56, 23]);
console.log(setObj);
Output:
Set(5) { 21, 34, 35, 56, 23 }If you don’t specify anything in the parameter, a new empty Set is created.
const setObj = new Set();
console.log(setObj);
Output:
Set(0) {}If you try to create a Set with repeating elements, the duplicate elements will be removed and a unique Set will be returned.
const setObj = new Set([1, 2, 3, 1, 2, 3]);
console.log(setObj);
Output:
Set(3) { 1, 2, 3 }You can also create a Set using mixed data types.
const setObj = new Set([1, 2, "Hello", [45, 67, 78]]);
console.log(setObj);
Output:
Set(4) { 1, 2, 'Hello', [ 45, 67, 78 ] }You can append a new element to the end of the Set object using the add() method. This method accepts the value of the element to add to the Set object as a parameter, and returns the new Set object with added value.
const setObj = new Set();
setObj.add("Welcome");
setObj.add("to");
setObj.add("MUO");
console.log(setObj);
Output:
Set(3) { 'Welcome', 'to', 'MUO' }You can directly pass the value as a parameter, or you can pass the variable as one instead.
const setObj = new Set();
// Appending value to a Set object
setObj.add("Welcome");
const var1 = "to";
const var2 = "MUO";
// Appending variable to a Set object
setObj.add(var1);
setObj.add(var2);
console.log(setObj);
Output:
Set(3) { 'Welcome', 'to', 'MUO' }The add() method also supports chaining.
const setObj = new Set();
// Chaining
setObj.add(1).add(2).add(3);
console.log(setObj);
Output:
Set(3) { 1, 2, 3 }If you try to append duplicate elements, only the first instance of the element will be saved.
const setObj = new Set();
setObj.add(1);
setObj.add(2);
setObj.add(3);
setObj.add("M");
setObj.add("U");
setObj.add("O");
setObj.add(1);
setObj.add(2);
setObj.add(3);
console.log(setObj);
Output:
Set(6) { 1, 2, 3, 'M', 'U', 'O' }You can remove all elements from a Set object using the clear() method. This method removes all the elements and returns undefined.
const setObj = new Set([1, 2, 3, 4, 5]);
console.log("Size of the Set object: " + setObj.size);
console.log(setObj);
setObj.clear();
console.log("Size of the Set object after clearing elements: " + setObj.size);
console.log(setObj);
Output:
Size of the Set object: 5
Set(5) { 1, 2, 3, 4, 5 }
Size of the Set object after clearing elements: 0
Set(0) {}You can delete a specific element from a Set object (if it exists) using the delete() method. This method accepts the value to be deleted from the Set. If the value is found, the method returns true. Otherwise, it’ll be false.
const setObj = new Set([1, 2, 3, 4, 5]);
console.log("Initial Set:");
console.log(setObj);
setObj.delete(3);
console.log("Set after deleting 3");
console.log(setObj);
Output:
Initial Set:
Set(5) { 1, 2, 3, 4, 5 }
Set after deleting 3
Set(4) { 1, 2, 4, 5 }You can check whether an element exists in a Set object using the has() method. This method accepts the value as a parameter to test for presence in the Set object. If the element is found, the method returns true; otherwise it’ll be false.
const setObj = new Set(["Welcome", "to", "MUO"]);
console.log(setObj.has("MUO"));
console.log(setObj.has("MakeUseOf"));
Output:
true
falseAccording to the official MDN Web Docs:
“The entries() method returns a new Iterator object that contains an array of [value, value] for each element in the Set object, in insertion order. For Set objects, there is no key like in Map objects. However, to keep the API similar to the Map object, each entry has the same value for its key and value here, so that an array [value, value] is returned.”
const setObj = new Set(["Welcome", "to", "MUO"]);
for(let entry of setObj.entries()) {
console.log(entry);
}
Output:
[ 'Welcome', 'Welcome' ]
[ 'to', 'to' ]
[ 'MUO', 'MUO' ]
const setObj = new Set(["Welcome", "to", "MUO"]);
for(let [key, value] of setObj.entries()) {
console.log(value);
}Output:
Welcome
to
MUO
The keys and values in the Set are identical.
const setObj = new Set(["Welcome", "to", "MUO"]);
for(let [key, value] of setObj.entries()) {
console.log(key === value);
}
Output:
true
true
trueThe forEach() method invokes a function for each element of the Set object. This method returns undefined.
const setObj = new Set([1, 2, 3, 4, 5]);
let sum = 0;
setObj.forEach(function(element) {
sum += element;
});
console.log(sum);
Output:
15The values() method returns an Iterator object that contains all the values in a Set, and it does this in insertion order.
const setObj = new Set([1, 2, 3, 4, 5]);
const iteratorObj = setObj.values();
for (let value of iteratorObj) {
console.log(value);
}
Output:
1
2
3
4
5Note: A Set object in JavaScript has no keys. But to make Sets compatible with Maps, the keys() method is used as an alias for the values() method. The keys() method behaves exactly the same as the values() method.
So, there you have it. Having read this article, you should have plenty to help you master creating Sets on JavaScript.
Creating Sets is crucial for any programmer looking to up their game. Once you’ve mastered this, you can move on to perfecting other skills—such as creating Arrays.
The post 8 JavaScript Set Methods You Should Master Today appeared first on VVDesigns.]]>


.png?q=50&fit=crop&w=750&dpr=1.5)


